XML C Parser인 libxml2 설치
작성자 정보
- 관리자 작성
- 작성일
컨텐츠 정보
- 4,194 조회
- 0 추천
-
목록
본문
XML C Parser인 libxml2 설치
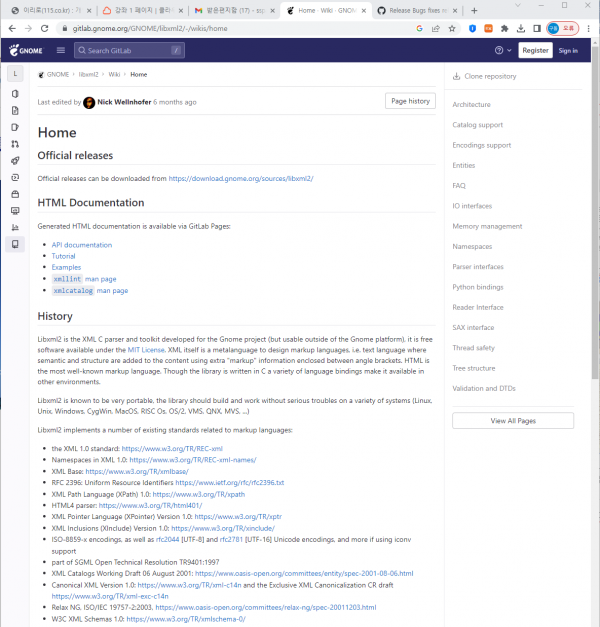
libxml2는 XML C 파서(parser)로서 리눅스의 Gnome프로젝트를 위한 툴킷되는 도구이며 MIT라이센스하에서는 자유로운 소프트웨어이다.
또한 libxml2는 LINUX뿐아니라 UNIX, 윈도우, CygWin, MacOS, OS/2등 다양한 시스템에서 큰 문제없이 설치되고 작동될 수 있다.
우리는 리눅스를 웹서버로서 활용하기 위해 웹페이지에서 xml라이브러리를 지원하기 위하여 libxml2를 설치하고자 한다.
libxml 공식 홈페이지 : http://xmlsoft.org/
자, 그럼 libxml2를 설치해 보도록하겠다.
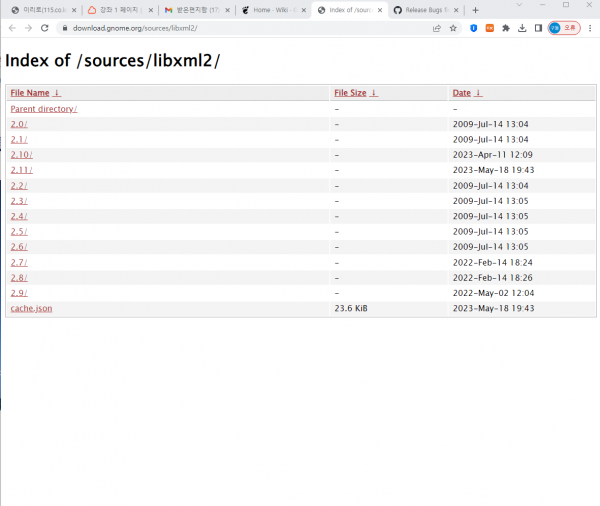
다음은 wget을 이용하여 아래 사이트에서 libxml2압축 소스파일을 가져온 것이다.
그리고 가져온 압축소스파일을 ls로 확인한 것이다.
|
[root@RockyLinux local]# wget https://download.gnome.org/sources/libxml2/2.9/libxml2-2.9.0.tar.xz --2023-06-28 11:48:14-- https://download.gnome.org/sources/libxml2/2.9/libxml2-2.9.0.tar.xz Resolving download.gnome.org (download.gnome.org)... 151.101.193.91, 151.101.129.91, 151.101.1.91, ... Connecting to download.gnome.org (download.gnome.org)|151.101.193.91|:443... connected. HTTP request sent, awaiting response... 302 Found Location: https://mirror.ossplanet.net/gnome/sources/libxml2/2.9/libxml2-2.9.0.tar.xz [following] --2023-06-28 11:48:15-- https://mirror.ossplanet.net/gnome/sources/libxml2/2.9/libxml2-2.9.0.tar.xz Resolving mirror.ossplanet.net (mirror.ossplanet.net)... 163.22.17.70, 2001:e10:6840:17::70 Connecting to mirror.ossplanet.net (mirror.ossplanet.net)|163.22.17.70|:443... connected. HTTP request sent, awaiting response... 200 OK Length: 3133964 (3.0M) [application/x-xz] Saving to: `libxml2-2.9.0.tar.xz'
libxml2-2.9.0.tar.xz 100%[=================================================>] 2.99M 509KB/s in 6.0s
2023-06-28 11:48:22 (509 KB/s) - `libxml2-2.9.0.tar.xz' saved [3133964/3133964]
[root@RockyLinux local]# [root@RockyLinux local]# [root@RockyLinux local]# ls -l libxml2-2.9.0.tar.xz -rw-r--r-- 1 root root 3133964 2월 15 2022 libxml2-2.9.0.tar.xz [root@RockyLinux local]# |
가져온 압축소스파일을 tar로 압축해제한다.
그러면 “libxml2-버전”으로된 디렉토리가 생성되면서 그 디렉토리내에 압축해제된 파일들이 저장된다.
|
[root@RockyLinux local]# tar Jxvf libxml2-2.9.0.tar.xz libxml2-2.9.0/ libxml2-2.9.0/globals.c libxml2-2.9.0/error.c libxml2-2.9.0/HTMLparser.c libxml2-2.9.0/testHTML.c libxml2-2.9.0/testThreadsWin32.c libxml2-2.9.0/xmlregexp.c libxml2-2.9.0/testchar.c libxml2-2.9.0/VxWorks/ libxml2-2.9.0/VxWorks/Makefile libxml2-2.9.0/VxWorks/README libxml2-2.9.0/VxWorks/build.sh libxml2-2.9.0/xmlstring.c libxml2-2.9.0/trio.c libxml2-2.9.0/testlimits.c libxml2-2.9.0/triostr.c libxml2-2.9.0/INSTALL libxml2-2.9.0/xzlib.c libxml2-2.9.0/gentest.py libxml2-2.9.0/trio.h libxml2-2.9.0/triostr.h … 이하생략 |
생성된 디렉토리로 이동한다.
|
[root@RockyLinux local]# cd libxml2-2.9.0/ [root@RockyLinux libxml2-2.9.0]# |
다음은 configure작업을 한다.
대부분의 시스템에서 별다른 옵션없이 configure작업이 된다.
하지만 “./configure --help”실행해 보면 보다 많은 옵션들을 볼 수 있다.
혹 configure과정에서 문제가 발생한다면 이 옵션들이 해결책이 될 수도 있다.
|
[root@RockyLinux libxml2-2.9.0]# ./configure checking build system type... x86_64-unknown-linux-gnu checking host system type... x86_64-unknown-linux-gnu checking for a BSD-compatible install... /usr/bin/install -c checking whether build environment is sane... yes checking for a thread-safe mkdir -p... /usr/bin/mkdir -p checking for gawk... gawk checking whether make sets $(MAKE)... yes checking whether make supports nested variables... yes checking for gcc... gcc checking whether the C compiler works... yes checking for C compiler default output file name... a.out checking for suffix of executables... checking whether we are cross compiling... no checking for suffix of object files... o checking whether we are using the GNU C compiler... yes checking whether gcc accepts -g... yes checking for gcc option to accept ISO C89... none needed checking for style of include used by make... GNU checking dependency style of gcc... gcc3 checking whether ln -s works... yes checking how to run the C preprocessor... gcc -E checking for rm... /usr/bin/rm checking for mv... /usr/bin/mv checking for tar... /usr/bin/tar checking for perl... /usr/bin/perl checking for wget... /usr/bin/wget checking for xmllint... /usr/local/bin/xmllint checking for xsltproc... /usr/bin/xsltproc |
이제 configure작업이 끝나고 컴파일하기 위해 make를 실행한다.
|
[root@RockyLinux libxml2-2.9.0]# make make all-recursive make[1]: 디렉터리 '/usr/local/libxml2-2.9.0' 들어감 Making all in include make[2]: 디렉터리 '/usr/local/libxml2-2.9.0/include' 들어감 Making all in libxml make[3]: 디렉터리 '/usr/local/libxml2-2.9.0/include/libxml' 들어감 make[3]: 'all'을(를) 위해 할 일이 없습니다.
make[3]: 디렉터리 '/usr/local/libxml2-2.9.0/include/libxml' 나감 make[3]: 디렉터리 '/usr/local/libxml2-2.9.0/include' 들어감 make[3]: 'all-am'을(를) 위해 할 일이 없습니다.
make[3]: 디렉터리 '/usr/local/libxml2-2.9.0/include' 나감 make[2]: 디렉터리 '/usr/local/libxml2-2.9.0/include' 나감 Making all in . make[2]: 디렉터리 '/usr/local/libxml2-2.9.0' 들어감 CC SAX.lo CC entities.lo entities.c: In function 'xmlCopyEntitiesTable__internal_alias': entities.c:947:31: warning: cast between incompatible function types from 'xmlEntity * (*)(xmlEntity *)' {aka 'struct _xmlEntity * (*)(struct _xmlEntity *)'} to 'void * (*)(void *, xmlChar *)' {aka 'void * (*)(void *, unsigned char *)'} [-Wcast-function-type] 947 | return(xmlHashCopy(table, (xmlHashCopier) xmlCopyEntity)); 이하생략.. |
그리고 이제 “make install”를 실행하여 컴파일 결과로 생성된 파일들을 설치한다.
|
[root@RockyLinux libxml2-2.9.0]# make install make install-recursive make[1]: 디렉터리 '/usr/local/libxml2-2.9.0' 들어감 Making install in include make[2]: 디렉터리 '/usr/local/libxml2-2.9.0/include' 들어감 Making install in libxml make[3]: 디렉터리 '/usr/local/libxml2-2.9.0/include/libxml' 들어감 make[4]: 디렉터리 '/usr/local/libxml2-2.9.0/include/libxml' 들어감 make[4]: 'install-exec-am'을(를) 위해 할 일이 없습니다.
test -z "/usr/local/include/libxml2/libxml" || /usr/bin/mkdir -p "/usr/local/include/libxml2/libxml" /usr/bin/install -c -m 644 SAX.h entities.h encoding.h parser.h parserInternals.h xmlerror.h HTMLparser.h HTMLtree.h debugXML.h tree.h list.h hash.h xpath.h xpathInternals.h xpointer.h xinclude.h xmlIO.h xmlmemory.h nanohttp.h nanoftp.h uri.h valid.h xlink.h xmlversion.h DOCBparser.h catalog.h threads.h globals.h c14n.h xmlautomata.h xmlregexp.h xmlmodule.h xmlschemas.h schemasInternals.h xmlschemastypes.h xmlstring.h xmlunicode.h xmlreader.h relaxng.h dict.h '/usr/local/include/libxml2/libxml' 이하생략.. |
이로써 관련 라이브러리들을 모두 설치하였다.
이제 MYSQL과 APACHE, 그리고 PHP와 PHP ZendOptimizer를 설치하도록하겠다.
관련자료
-
이전
-
다음


